Add a New Song
Edit an existing Song
Presentation Manager comes complete with a song
editor so you can add all your own songs to the database.
There is no limit to the number of songs you can add to Presentation
Manager.
To add a new song Begin by clicking on the "Song" Button on the
Main Toolbar, or the mini song button on the toolbar.
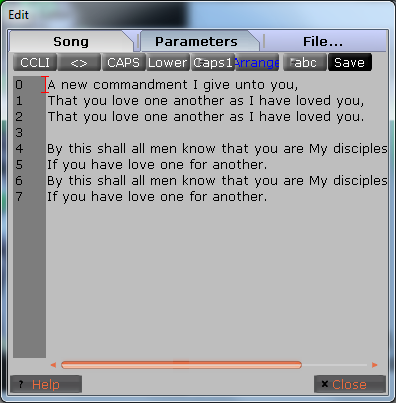
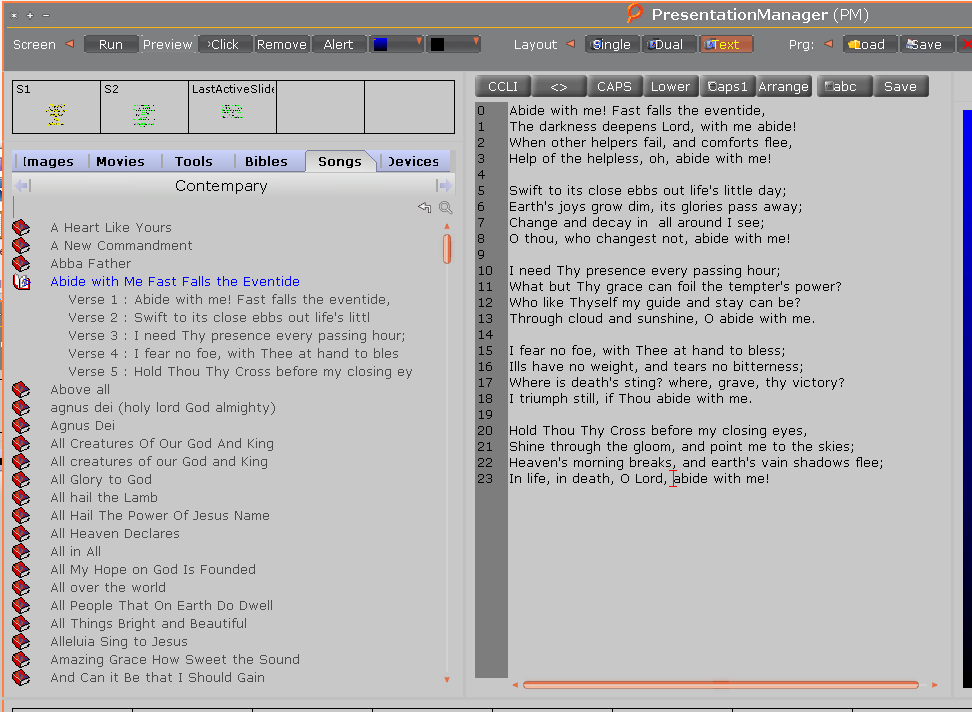
Clicking the "Song" button will display the Song Editor and create a new song in the current song palette.
You can also launch the Song Editor by right-clicking on the title of any song in the palette.
To edit an existing song right click on the song,
Alternatively select the text layout and click on the song
when "click" is live(green) songs distlay in the text layout are displyed can not be edited

Separating Verses
When a new song is typed (or
pasted) in, there
are two ways Presentation Manager will break it down into verses.
- By default, every space between lines in a song will create a new
verse with a default name (verse 1, verse 2...).
- You can also setup the verses manually. If you setup the
verses manually you can leave a space between lines and Presentation
Manager will not consider that a verse.
To setup the the verses manually begin by clicking the "Show Hide Tags"
button. This will display the code responsible for dividing the song into verses.
When the tags are shown you will see that each verse begins with a
verse opening tag, <Verse>,
and ends with a corresponding verse closing tag, </Verse>.
Any text between an opening tag and its corresponging closing tag will be considered a verse. In this
way you can also name the verses anything you want as long as the
opening and closing tag correspond. If you want to name a verse
"chorus", for example, use the tags <Chorus> and </Chorus>.
Be
sure to setup the opening and closing tags exactly the same except
for the slash (/) at the beginning of the
closer.
Once you have made your changes be sure to save the song using the "File" tab.

Buttons
Features
The Cap All button capitalizes
all the letters in the song.
The Lower All button makes all
the letters lowercase, except the first letter of each line.
The Cap First Ltr button will
capitalize the first letter of every word.
The <> will hide or show the tags
The Arrange Set Max number of character per line and the
maximum number of lines per verse so allowing the user to
quickly arrange how the song is laid out. If the Max Line Chars
is set to 25 then every line that has over 25 characters (including
spaces) will be broken into two lines. If the max Verse Lines is
set to 8 (and the "Set Verse Lines" box is checked) then every verse
that has more than eight lines will be broken into two verses. In
order to apply these two settings you will need to click the Arrange button.
The Reset button will
eliminate all changes to a song since the last time it was saved.

Attributes
The Attributes tab allows you to set useful information for a song like
Title, Author, CCLI# etc. Besides being a store for information
about the songs, these attributes allow you to search for songs based on these attributes.
For example, if you have the "Author" entered on all your songs, then
you could do a search for "Author: Luther" in the search box and it
would find all the songs by Martin Luther.
You can add any attributes you desire eg key or to set the key and
category for a song. This is useful for doing song
searches. To search for all the songs in the key of F type "key:
F". To search for all the songs of adoration type "category:
adoration". To learn more about searches click
here.


